Wednesday, October 2, 2013

5 Ways to Welcome Fall into Your Kitchen Home Decor

5 Ways to Welcome Fall into Your Kitchen Home Decor:

I was contacted by Stacey, a writer for the Commercial Appeal, for some ideas for fall decorating.  You can read her full article here.  These are the 5 items I suggested: 
  • Switch out the shades on your chandelier.  This could be to a fun fall color or even burlap. 
These are some great looking ones I just ordered in for a client.

  • Burlap continues to be super hot this fall.  Add it as a table runner or bunch up a square of fabric under your table centerpeice. 
  • Put out a clear bowl filled with in-shell mixed nuts.  This is an inexpensive (and tasty) way to add some color and texture.
  • Grab some branches from your yard.  If you are lucky enough to have birch trees, they have install fall appeal.  But any branch will add dimension and height.  If you want to jazz it up, you can spray paint them a fun mettalic color, like gold.
  • Group lanterns together for an eye catching display.  Add berries or candles to bring in some fall color or scents.


I love fall!  Just the thought of snuggling with a warm cozy throw and a bowl of soup makes me smile.  So, let's get our homes ready to celebrate as the cooler season approaches!


Pin It

Tuesday, September 24, 2013

How to DIY a Paper Covered Book

 
You may have seen these books in boutique stores and wondered how to do it yourself (I know I did).  So I got an old book and decided to jump in and try it out.  I didn't want to just make a book cover that slips over the cover, but one that became part of the book.  By covering a book yourself, this allows you to pick a book sized to your space and covered to coordinate with your decor.

Here is how I did it:

First I gathered my supplies.  You will need a hardcover book, scrapbook paper, Mod Podge (I used Matte finish), a foam brush, and a paper trimmer or craft knife (not shown). 
I chose 2 pieces of scrapbook paper, one for my binding and one for the cover.  You could also use wrapping paper or handmade paper.


Next I lined up the edge of the paper I was using to cover the binding and made a mark on where to cut.  Make sure you wrap the paper around the book while it is closed or you may come up short.  


I then lined up the edge of my black paper that I'm using on the binding with the edge of the lining on the inside of the cover.

I made a mark at the edge of the book so I could copy that measurement to use for the opposite end.  Also mark the top edge of the book too. 

Once I had my mark telling me how much paper I needed to wrap the edge, I could apply that same measurement to the top edge.  Now it's time to cut my patterned paper to the front and back cover.
 

On the patterend paper, I lined up the edge of the paper with the edge of the lining and marked where I needed to cut just like with the black paper. 
On went a layer of Mod podge on the side where my patterned paper will go.  I smoothed it out by going in the same direction with the brush.  It dries pretty quick and doesn't slide easily, so make sure you are putting your paper in the right place.  On the other side of the book, I decided to try a different cutting approach.  I glued first then cut it using a straight edge and craft knife.  The cut was not as smooth, but it is more forgiving if you don't have the paper in quite the right place before the glue dries.
Now that I have the paper adhered, I was ready to wrap the edges.
I folded one edge up, then folded in the point of the corner.  You repeat this process for the opposite edge parallel to the one you just did.
Once both corners are folded in, you can fold up the last edge.
 
After the paper is glued down, I applied 2 coats of Mod Podge over the top.  This also helped to seal all the edges firmly.
 
It only takes a few minutes to dry and you are ready to display your new paper covered book! 


Pin It

Friday, March 15, 2013

Fresh Strawberries

Last April, I went to my favorite Pick-Your-Own farm, Jones Orchard, and picked strawberries.  I have never been successful at growing them at home.  But this is even better, because you can pick the best ones! 

This is a fantastic recipe for using fresh strawberries.


Fresh Strawberry Yogurt Cake


The great thing about strawberries is that they freeze well.  I even threw the frozen strawberries in the blender and had fresh strawberry smoothies! 

I can't wait until the strawberries are ready for picking this year! Pin It

Tuesday, December 11, 2012

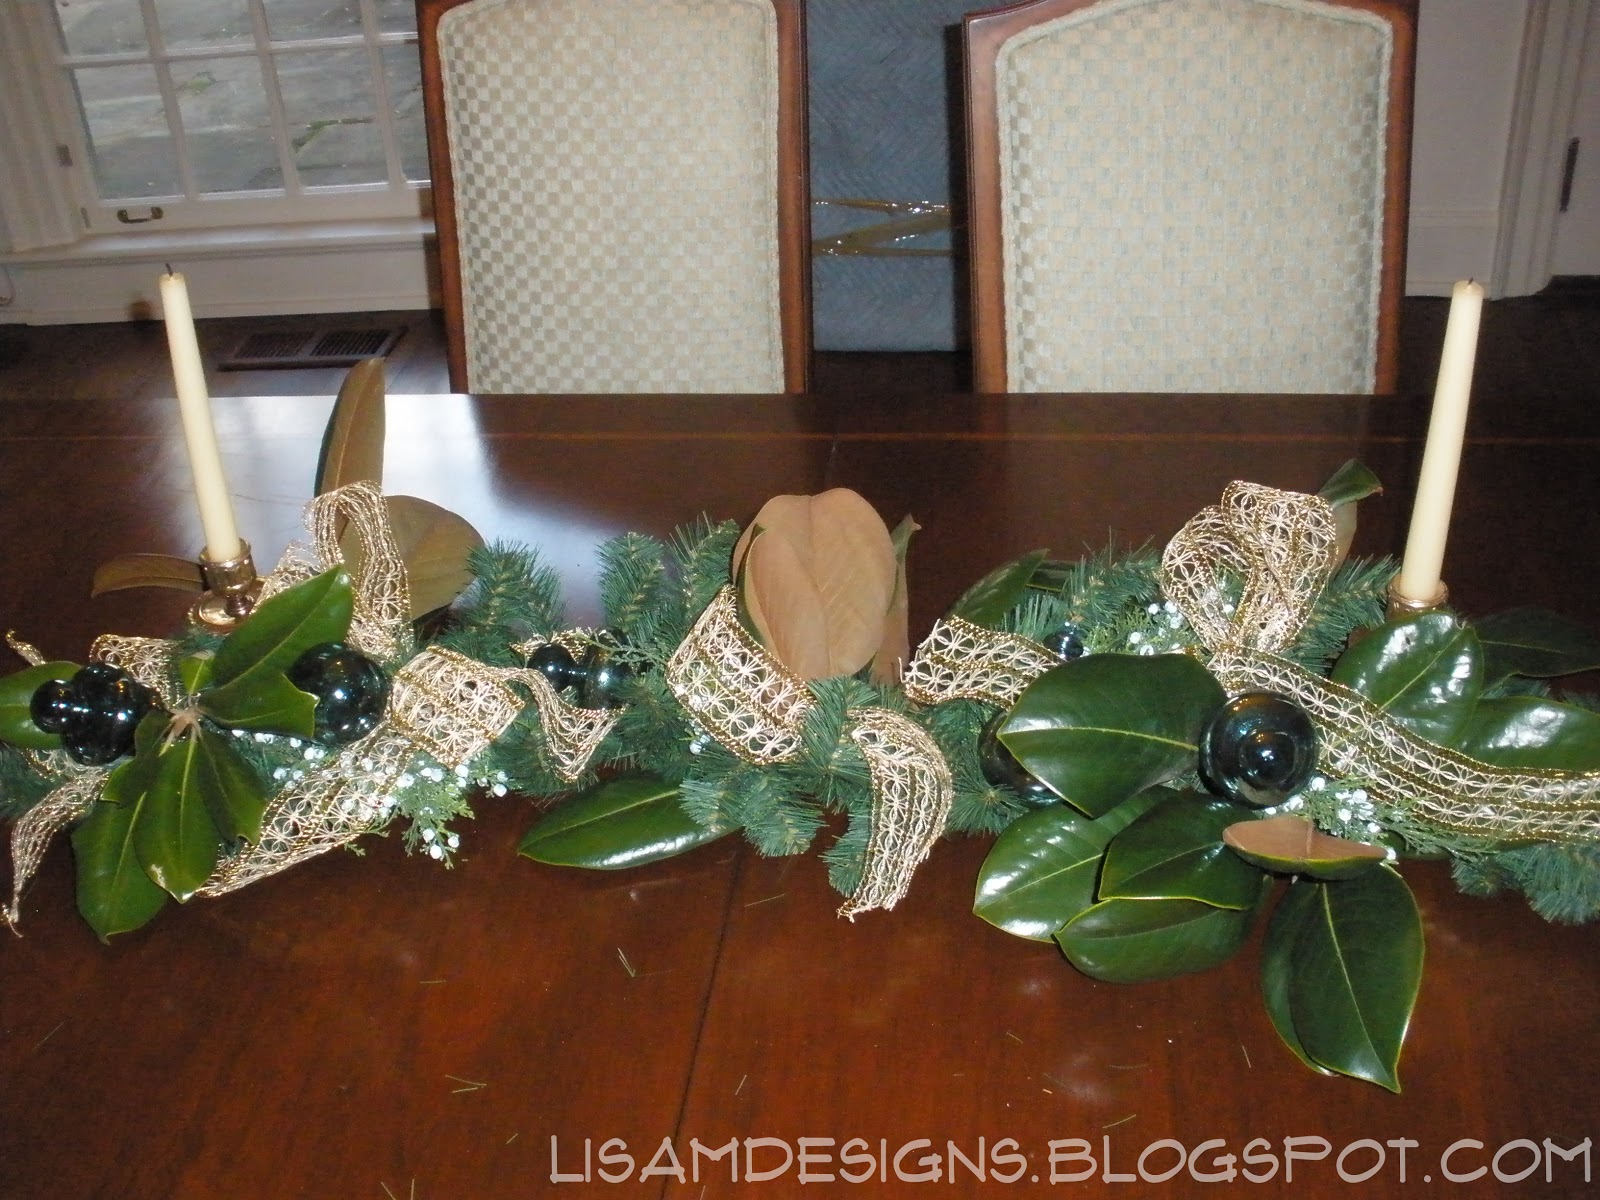
A Quick and Easy Holiday Table Centerpiece


This simple centerpiece is great to keep on the table throughout the holiday season.  You start with a plan piece of greenery and 2 candlesticks.  We added some (fake) spruce for interest, but you could just use the greenery.   Next, add in some fresh magnolia leaves, cut from the yard, to give it life.  Magnolia leaves hold up great and can be sprayed with a floral spray to extend their life.  Nestle in some glass ornaments and accent with ribbon, and you have a natural simple centerpiece.

Pin It

What to Make with Fresh Pears?

After I picked all these pears (see last post), I had to do something with them.  The apples were pretty easy, but the pears were a bit more challenging.  I picked a variety of pear called the Keiffer, which is a crisp pear that is good for baking. So here is what I have done with them.


I made Pear Bread,which is really a quick bread only made in a bundt pan.
A few notes: I diced my pears rather than grate them and used pecans rather than walnuts.  I only ended up needing 2 pears to make 2 cups. I did use butter, not oil, and cooked it for 60 minutes.  If I had let it go any longer, it would have burned.
This made a great breakfast bread.

I also made a Pear Crisp from the Pioneer Woman. Sorry I didn't get a picture. 

And lastly, I canned Ginger Pear Preserves.  I got the recipe straight from the Ball jar makers themselves.
These would make great gifts as well.  I added a tag and some ribbon.

I hope I have given you a few ideas for fresh pears.

Pin It

Friday, October 5, 2012

Apples and Pears

As you can tell by now, I love to go to the Pick-your-own local farm for fresh fruit.  And fall is apple and pear season.  So, I decided to pick both.

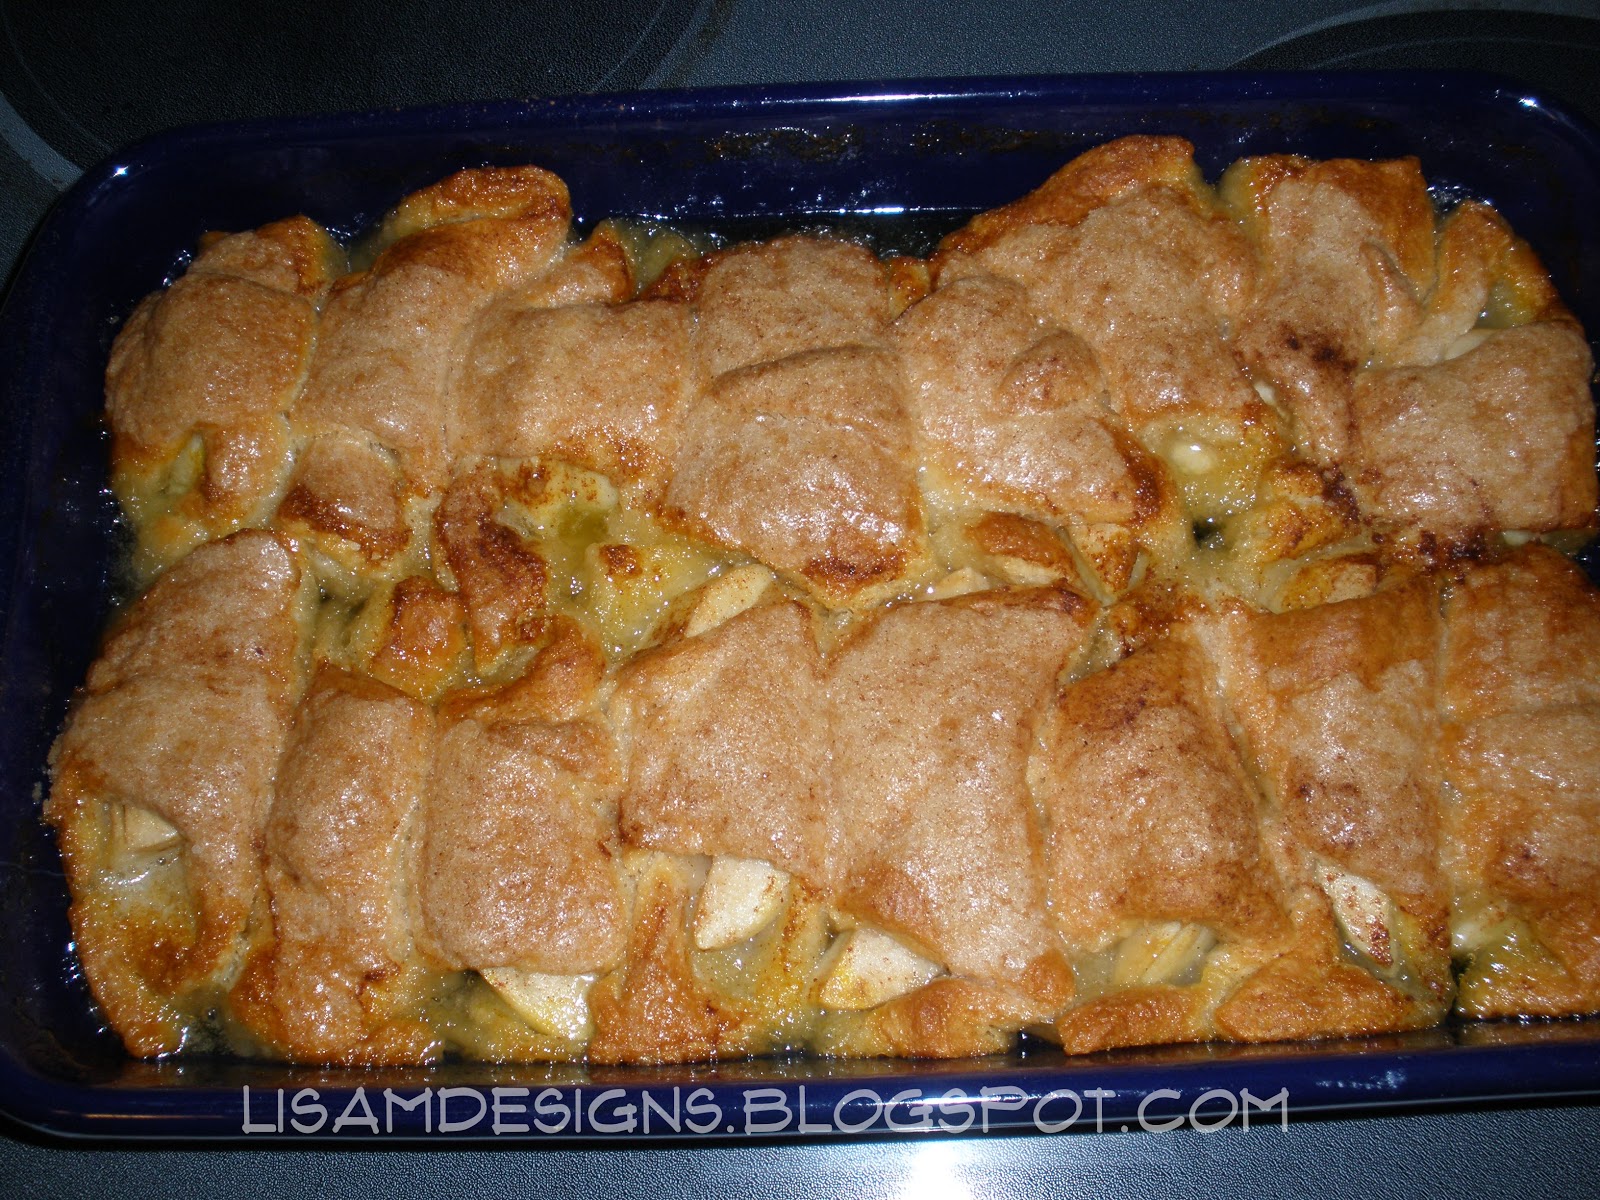
The type of apple I picked is the Arkansas Black apple, which I found is a great baking apple and derived from the Winesap.  Since it is so great for baking, I tried this Apple Dumpling recipe from the Pioneer Woman.  Soo good and easy too!  Click on the link for the recipe.

I am planning on canning some apple pie filling and peach preserves.  So I will post that as soon as I do.

I really love the experience of picking your own.  And I like that in the process I am helping local farms and being green.  Oh, and not to mention you have to make something with all that yummy fresh produce! 


Pin It

Organizing Gift Card Balances

If you are like me, you get a lot of gift cards as gifts.  You then have to call on the balances each time before you use them, so you know how much you have left.  Or you wrap the receipt around the gift card, but with fading ink, soon can't read it.  Here is what I have found works for me.
 I write down the balance and the date on the sticky part of a post-it note, cut it out, and attach it to each card.  It doesn't fall off or get in the way of scanning.  I then update it as the balance changes.  Now I know how much I have left to spend.  Pin It

Monday, July 30, 2012

Peanut Butter Surprise Brownie Cookie

So, you know those recipes you save and say to yourself, "Someday I'm gonna make that."?  And then you wait for the right time or occasion...and it never comes.  Well, this was one of those recipes.  But why not just make it as a treat for ourselves and to share?  Which is precisely what I did.

And they were yummy! Making me wonder why I waited so long to try them :)

Here is the link to the recipe, courtesy of Pillsbury
http://www.pillsbury.com/recipes/peanut-butter-brownie-cookies/78d2e747-151c-48d1-838b-fdde7d1e3e37/

Pin It

Friday, July 13, 2012

Update Your Existing Vanity With Molding

The great thing about being self-employed is that I don't HAVE to sell cabinetry.  It's nice to be able to help everyone make their space better.  This is one of those examples.  Sorry I don't have a before picture, but it looked like most every "builder" vanity from the 80's with an oak cabinet and a cultured marble top.  She didn't want to go to the expense of a new floor and cabinet, but still wanted to update the powder room.  We added some unfinished oak molding to raise the short vanity to a more updated height. The entire cabinet was painted black and received new hardware.
To complete the look, I chose a new paint color for the room, added a granite remnant top, new faucet, mirror, vanity light (not shown), and a new throw rug.  Now she has a bathroom she's proud of.
  
Pin It

Thursday, July 5, 2012

Happy Fourth of July!

I hope everyone had a wonderful 4th.  And since I am sure some of you will still be celebrating this weekend, I am sharing my dishes from our pot-luck barbeque last night.
First up are these Pretzel Sparklers.
My tip: I used milk chocolate chips rather than shaving chocolate from a bar, it all melts down the same. These were so much fun and yummy too! They look especially great in my Patriotic Jar from The Round Top Collection.  A benefit of having a booth in a store is getting to keep some of the items for yourself!
The other item I made was the Bacon Tomato Pasta Salad.


Very refreshing for the warm evening!  I only made half of the recipe, by the way.  I served it in a simple Corningware dish nestled into a festive basket.  The added bonus of this is that you can put an ice pack below the dish and it's hidden by the basket.  Also, you can use the glass cover for the dish, if need be.  Super simple and easily changeable for the season.  I hope this inspires you to come up with a fun and festive way to serve your food!  I would love to hear some of your ideas! Pin It

Monday, June 18, 2012

Peaches!

I am so fortunate to live close to a pick-your-own farm, Jones Orchard in Millington, TN.  If you don't know where one is in your area, this is a great website to help you locate one close by.  www.pickyourown.org  Click on the "start here to find a farm near you" button on the top left.  Then click on your state.  Scroll all the way down and it lists all the farms for each county and their info.

Just walking in to the area with the peach trees was enough to make your mouth water.  Such a glorious aroma!  I filled up my basket (for a great price, I might add) and headed home to see what I could make.  The one request my boyfriend had was peach cobbler.  Since most recipes called for canned peaches, I decided to look in the classic Betty Crocker red and white cookbook.  And there was a recipe for cobbler using fresh fruit, which I included below.

You could really taste the just-picked freshness!  What a great activity to do with the kids...they can see food from farm to table.  Plus, you get to support your local farms and community.  I encourage you to take a break from hectic life and stop and smell the peaches...it's good for the soul and the tummy!

Fruit Cobbler
Peach Filling (see below)
1 cup all-purpose flour
1/4 cup suar
1 teaspoon baking powder
1/2 teaspoon cinnamon
3 tablespoons butter
1 beaten egg
3 tablespoons milk

Peach filling:
In a saucepan combine 1/3 to 2/3 cups sugar, 1 tablespoon cornstarch.  Add 1/4 cup water. Stir in 4 cups fresh unsweetened peach slices.  I skinned my peaches and chopped them up, rather than doing slices.  Next time, I think I would add a little extra peaches.  Cook and stir till thickened and bubbly.

Prepare filling.  Keep hot.  For topping, mix flour, sugar, baking powder, and cinnamon.  Cut in butter till mixture resembles coarse crumbs.  Combine egg and milk.  Add to flour mixture, stirring just to moisten.

Transfer filling to an 8x8 baking dish.  Drop topping into 6 mounds atop hot filling.  Bake in a 400 degree oven for 20 to 25 minutes or till toothpick inserted into topping comes out clean.  Serve warm.  I also doubled the recipe because I knew I would want more :) Pin It

Monday, June 11, 2012

Keep Your Existing Tub

Yep, I said keep it!  I know you wouldn't think a designer would say to keep anything existing about a dated bathroom.  But if your tub is neutral and in good shape, consider keeping it.  With a little freshening up, this could be a great way to stretch your budget.
Take a look at the first one...
 Very plain (and boring) cultured marble tub.  This is the first thing you see when walking into this bathroom.  And after...

I removed the side splashes and shelf behind the tub.  Then added mosaic tile to the surround and a granite shelf.  We updated the faucets and added a wood paneled tub apron.  A tip: These are actually operational cabinet fronts so you have access to the plumbing.  Now that's a tub worth being a focal point!
   
How about this one...
 Another boring tub, in this case acrylic.  And after...
Again, I removed the side splashes surrounding the tub and added tile with a mosaic insert.  This time I was able to use a tiled tub apron since we added an access panel to the plumbing in a closet located behind the tub spout.

Now on both of these projects, the customer originally thought they wanted a new tub because they were unattractive.  Both were pleasantly surprised with the outcome.  And I was able to use that money elsewhere.


Pin It

Thursday, July 15, 2010

The Often Forgotten Shower Floor


A shower floor is often an overlooked area in bathroom design. This small area is an opportunity to use more expensive tile or have fun with color or texture. The three examples above come from the same house, although each one is unique to the individual bath. The first one is a hexagon shaped Travertine which lends a casual natural feel. The second shows smooth river rocks which evokes a spa feel as soon as you step in. The third example shows a small mosaic made of marble giving a feel of refined elegance. So on your next bathroom, don't forget the shower floor...and have fun with it! Pin It

Thursday, April 29, 2010

What I've been doing

I am taking the liberty of cheating a bit with some links. I am attaching two blog links, that I have been featured in, showing what I have been up to.

Most recently, the Decorator's Showhouse...
http://shopbellavita.com/BlogRetrieve.aspx?BlogID=4604&PostID=139634


And, some work for a wedding photographer (who is amazing!!!)...
http://southerndesign.nathanraab.com/?p=108


I will try to be diligent in the upcoming month with posting some new fun stuff! Pin It

Friday, January 15, 2010

Laundry Room Trend

Yes, I said Laundry Room! More and more people are adding laundry rooms to the list of rooms that deserve an update. We do spend a lot of time in there after all...so it should be a space that is functional. I am featuring three laundry room renovations. All were done at the same time as their kitchen remodel.

The first one shows that you can take the cabinets out of the existing kitchen and re-purpose them for the laundry room. We picked the best cabinets, cleaned them up, and added new hardware. Now they look great and with little investment!
After Before


This low-budget option used thermofoil cabinets, thus allowing them to make the renovation changes they needed in this room.


After Before


The third example shows a laundry room that is very visible from the kitchen. In order to have continuity, we used cabinets that match the kitchen. They also made renovation changes that included removing an adjacent powder room.
After
Before
On your next kitchen renovation, consider the often over-looked laundry room as well.


Pin It

Saturday, January 9, 2010

A Warm Inviting Space

BeforeAfter

I wanted to show a kitchen that I just completed and truly love! (Not to mention it was for, quite possibly, the nicest customers I have ever had!) One reason I wanted to feature this is because it is a wood kitchen...Cherry in fact. So many people think that they need white kitchens or it will look like a cave. This proves that is not the case. The key is to visually open up the kitchen and improve the lighting. This is something that I strive to do in every kitchen regardless of color. I think one of the reasons we see so many white kitchens these days in magazines is because they photograph better. But in person, the beauty of wood is breathtaking. I definately do many rich wood bathroom vanities, especially in master baths. But mostly the kitchens are white with maybe a wood island for warmth. While the white is classic and clean, I encourage you to think outside of the box and create a warm and inviting space!
Pin It

Thursday, December 10, 2009

Christmas Elves!


This is the exhausting, but fun, season of Christmas decorating. Anne bought us matching aprons this year to complete our look. Now we truly look the "Christmas Elves" part! We have a few more add-ons to do, but we finally made it through the hectic season! We enjoy being able to do this service for all of our dedicated clients! The greatest part is seeing their faces light up when they come home to see what we have done!


Pin It